Ok maybe not, but that doesn't mean I didn't buy it anyway. I wanted it to be my guinea pig in a refashion experiment. I'm always seeing these beautiful refashions on blogs and figured, ok it's time to try one for myself.. so here's what I did. A very basic, nothing fancy refashion.
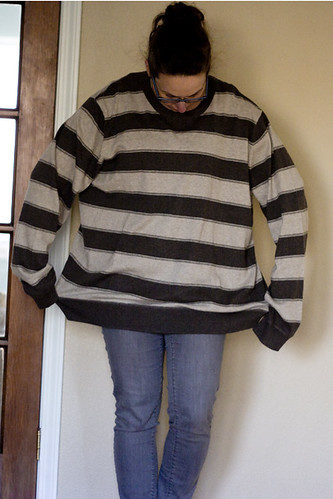
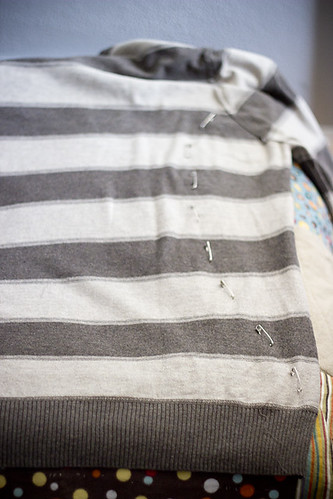
First I put the sweater on inside out, and pinned my little heart out. No not pinterest, like with real live hurt when you accidentally stab your side kinda pins. Then I tried to take it off and realized I'd pinned not only the sweater together, but also my shirt I was wearing.... starting over, pin without pinning yourself to the sweater.
This is the point where you could spend hours lining all of the lines up front to back so they will meet perfectly at the seam... this is where I said "eh good enough" because I'm the most impatient person in the word. (My mom is probably rolling her eyes because she would have spent 10 hours making sure they lined up perfect)
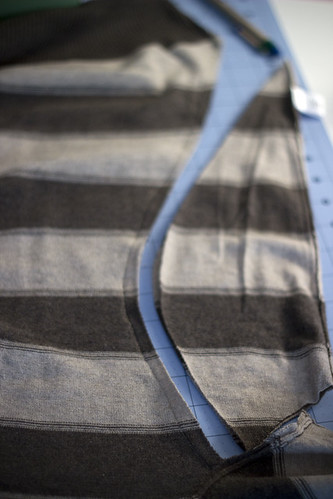
Next I sewed up the sides using my pins as a guide, then I took a rotary cutter and cut away the excess material. *see picture below* (I left the arms attached at this point since I wasn't sure how long I wanted the sleeves, I just cut along the armpit to detach the side panel I just cut off)
(I totally took the above picture upside down... think of the neck hole being at the bottom of the shot with the arm going off to the right. Ya think my body is shaped a little more curvy then the original sweater.. nah not one bit...)

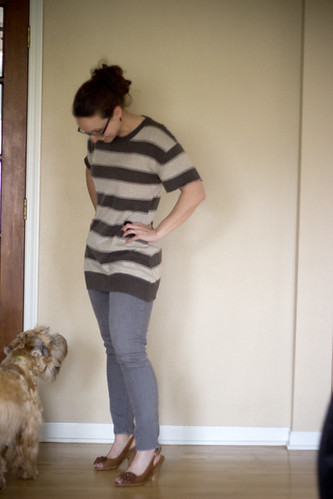
Final step was to slice off the arms and sew the armpit together. I used a serger to finish the inside seams along with the edges of the sleeves. *see above* (I know most people don't have a serger so if you don't just use a zig-zag stitch so the edges don't unravel all over the place) I was trying to decide if I'd fold up the sleeves and sew a hem to make them looked finished, but decided against it, deconstructed look here I come!
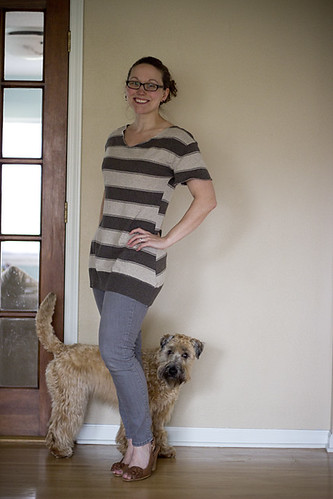
At this point I decided I didn't like the original sweater neckline and wanted to change it up. You'll also notice that Hobbes felt she should be part of the photo shoot.
I freecut the neck opening using my rotary cutter again, to keep things simple I made the same scooped neckline for the front and back so I only had to make one cut through the front and back of the material at the same time. *i'm lazy* To finish it off I used my serger again so the edges wouldn't fray.
(Notice the horribly lined up side seams... yes mom you were right, I should have taken my time and lined them up. I rock.)
Amazingly easy and only took me about an hour from start to finish. Gotta love projects like that.
One bad thing about making the front and back neck hole the same... you don't know which side is the front anymore... I'm actually wearing it backwards in the last shot, look at the before I changed the neckline shot, that side seam lines up WAY better.. at least I got one side lined up nice :) That counts for something doesn't it???
Do you refashion? Got any tips of tricks or favorite projects? How the hell do you get side seams to line up??
Tweet

Your email will never be displayed publicly, so don't be scared to comment! :) Oh and make sure you type in your blog link so I can click over to you! There is a spot you can type it in.
I LOVE IT!!!! Great job! (although the stripes do sort of make me laugh!)
ReplyDeleteYou're so talented! I must try this.
ReplyDeleteThanks so much Emily!
ReplyDeleteAt least the one side looks good LOL... yeah should have taken more time.... I've learned my lesson for next time :)
ReplyDeleteamazing transformation, i'm so impressed!
ReplyDeleteSo much fun! I wish I had a clue how to do fun stuff like this. I need to make another skirt like we did last summer to get my rusty sewing skills back in practice!
ReplyDeleteI'm totally in for a sewing date!! And we should go to the new bakery in pittsford village, it's AMAZING!! You'll love it. We went for coffee and I had the most delicious egg sandwich, they have lunch sammies too! Lets do it! :)
ReplyDelete