Share |

24x24 Sea Kraken Cone Crawl

Simply because it's January doesn't mean you shouldn't go out and enjoy a nice cone full of home made ice cream! Cold weather aside, for this months 24x24 sponsored by Foodbuzz, I proposed a cone crawl of sorts tasting all of the wonderful unique flavors Rochester had to offer during the winter months. I planned it out looking up flavors on websites, noting which creameries were closed for the season. It was all ready to go... until I started calling places... and found out that most hadn't updated their websites to say they were closed. *insert wrench into original plans*
moonlight
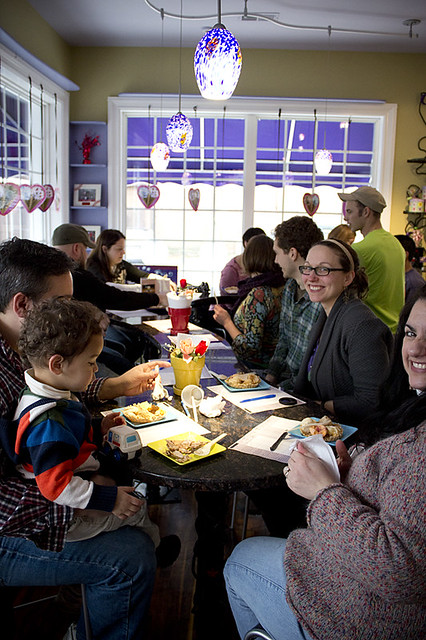
Even though a few were still open, I decided to change my plans slightly when I stumbled upon a unique feature of a creamery I already knew and loved. Moonlight Creamery offers tasting parties! Most people go for a full dessert tasting but I asked if it was possible to stick strictly to ice cream. Heidi, the owner, and amazing host, said it wouldn't be a problem and set us up for a fabulous mid afternoon party. (scheduled perfectly around nap times)
kidstable
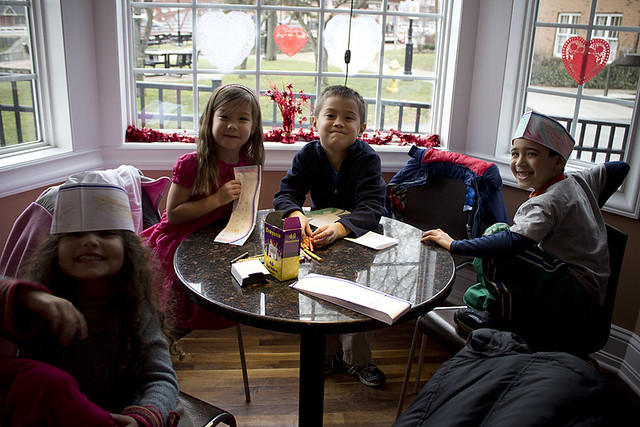
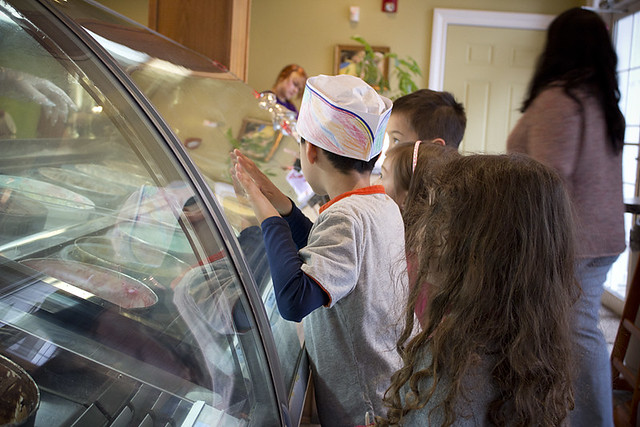
The kids were set up with old school ice cream hats to color on, and plenty of ice cream themed coloring book pages. The kids got full run on the shop to pick whatever sundae they wanted... although not one wanted one. Simple scoops of cake batter, chocolate, and strawberry were the winners for this group.
anticipation
The adults were in for a marathon of eating, but first a little education. Heidi told us all about how they make the ice cream, using as many local ingredients as possible. They use cream from cows that are rbst-free, and are from upstate NY. Things like the coffee and espresso used in their flavors come from Joe Bean, another favorite place of mine here in Rochester. The other interesting thing to note is their ice cream is considered premium premium, that means it contains 14% milk fat (yeah low fat eating John wasn't so excited when he heard that part, but lets face the facts, he loved every minute of it!) She also told us about the % of air that goes into their ice cream and how that effects the texture and creaminess of it. Some companies pump in more air so they can get more bang for their buck, as much as 50% of it is air. At Moonlight, only 20% is air, making for a super creamy decadent treat. You can tell Heidi loves what she does and truthfully cares about the quality of ingredients, and the impact things will have on the environment. (All cups, spoons, and even drink cups are made to be 100% biodegradable.)

The 13 adults were in for 3 flights of ice cream. We were taught to sample them like you do wine, noting the appearance, aroma, texture, inclusions, and finish. We were even given sheets to fill out as we experienced each flavor. Not being told what the flavors were, we had to use our senses to figure it out! I found out mine weren't very good at picking up on some of the more subtle flavors... but I was spot on with others! One participant was able to guess the exact brand of booze used in one variety... nice work :)
adulttable
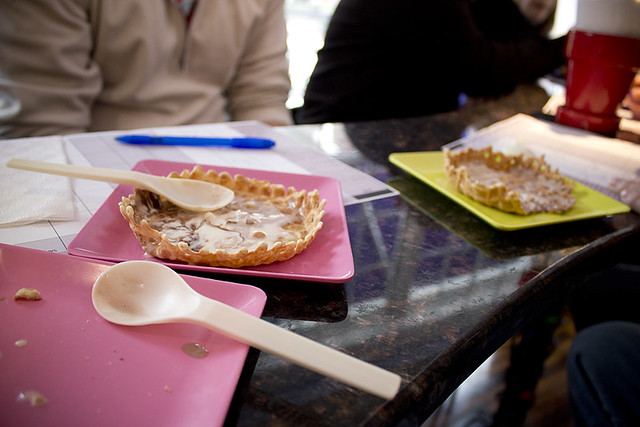
Flight one... ummm yeah, sorry too busy experiencing the ice cream that I forgot to take a shot! HA! We had three flavors, Butterbeer (any Harry Potter fans out there?), Smore, and Chocolate Almond. Of these three, smore was my favorite. (see that spoon below... it's made from potato! don't worry it doesn't melt and taste like potato in your ice cream)
flight1
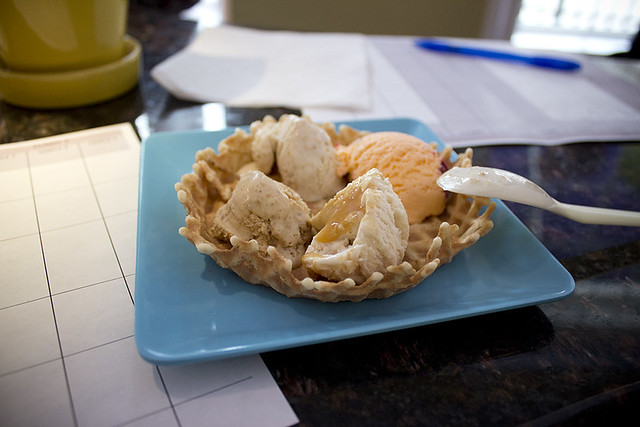
Flight two brought four flavors, Pumpkin gingersnap (DELICIOUS), Mango raspberry, Brown sugar oatmeal (one of my favorites), and bananas foster (wasn't digging this one, but others loved it)
flight2
Flight three contained John's favorite, Espresso heath bar, the other two were Baileys, and another unique flavor, and namesake and inspiration for this 24x24 proposal, Sea Kraken! (salted caramel with nuts)
flight3
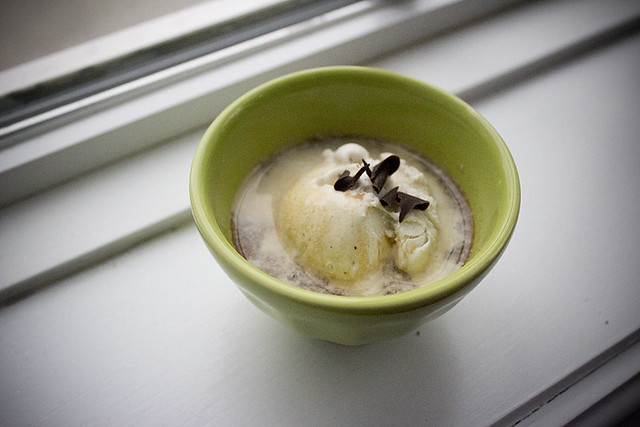
At this point you're probably thinking, wow I'd sure be full... well it's not time to stop yet. It was time to wake up with an affogato, AKA a small scoop of Madagascar vanilla ice cream drowned in a shot of espresso... simply put TO DIE FOR. My favorite thing from the whole day. What an experience, the warm strong taste of the espresso bathing over the cool calming vanilla. LOVE.
afagatto
What's that? You're full? Sorry, we're not done yet. To end the night everyone got to pick out a sundae with whatever flavors and toppings they wanted. True, this is a little out of line with my normal everything in moderation mantra... but sometimes, you just have to let loose and enjoy a special treat :)

What flavor would you have liked the best? Have you ever had an affogato? Would you try one?

Thanks again Foodbuzz for making this possible and sponsoring this event!!

Your email will never be displayed publicly, so don't be scared to comment! :) Oh and make sure you type in your blog link so I can click over to you! There is a spot you can type it in.

5 chews:

Friday and a winner

Happy Friday! I've been in a baking rut lately... not that I'm not baking, I just keep baking the same things!! Like peanut butter chocolate chippers, and healthy chocolate chip cookies, and banana bread! All tasty.. but kinda boring for blog posts since I've already made them :)

So I guess all I have for you today is the Novica winner! That's pretty exciting right? Drum roll please.... the winner picked by random.org isssss... cookingalamel! I'll send you an email, if I don't hear back within three days I'll pick a new winner.

Thanks everyone for entering and if you haven't yet check out Novica!

So any plans this weekend?? We may go look at a puppy again!! EEK!!! SO EXCITED!!!

Your email will never be displayed publicly, so don't be scared to comment! :) Oh and make sure you type in your blog link so I can click over to you! There is a spot you can type it in.

3 chews:

Ankle Warmers

Psst... Don't forget to enter the giveaway!

I fully admit it, I'm a white athletic sock and just about every type of shoe kinda girl... sure I'll wear tights with some pumps when I have to go to a work meeting, I don't totally embarrass myself... but most work days it's just me, a few equally crazy coworkers, and the work cats. (they are sisters, and yes they sleep just like that every day on my desk...the box corrals them rather nicely)

Back to me being weird...Why wear uncomfy thick socks when I can just wear my low cut athletics that I love so dearly??

This does bring on an issue in the winter though... snow boots and athletic socks = cold ankles... Sure sure, wear warm bulky socks... but... but... I don't want to!!! Instead I'll just crochet up a pair of these bad boys. She calls them a boot cuff... I call them ankle warmers, a shorter version of their second cousin the leg warmer. Chilly ankle problems solved. (Admit it.. I'm so freakin stylish... wow I totally look like I have man feet in that last picture.. rock on.)
legwarmers
What weird clothing habits do you have? Are you a sock and sandal person? (I totally do it, old man at heart) How about other weird "what not to wear" violations?? They would have a field day with me...

Your email will never be displayed publicly, so don't be scared to comment! :) Oh and make sure you type in your blog link so I can click over to you! There is a spot you can type it in.

6 chews:

GF Muffin FAIL

Don't forget to enter the giveaway!

Oye... oye... OYE... not good, really not good. I don't think they are salvageable... but I HATE throwing things out... and wasting ingredients. No need to link to the recipe, it was from a blog, and their pictures made them look beautiful... not like mine... which makes me wonder if I missed a step... or something... 3/4 of a cup of peanut butter... 3/4 cup brown sugar... brown rice and garbanzo bean flour... 1/2 Tbs pumpkin pie spice...and they don't really taste like anything... at all?? That white center is a yogurt center... but it just tasted like egg if you ask me... not a good thing in my book. Don't get me wrong I LOVE eggs... but I don't love having a lump of egg in the center of my muffin...
gfFAIL
I was making these to bring into my GF coworker... I will probably bring them in still to let her try... but I'll for sure warn her first... eeek. SORRY!!! UPDATE: John ate 4 of these between yesterday and this morning... and says they have a subtle taste, but they aren't horrible... sooo maybe my taste buds were off yesterday? Hard to say... maybe John is just a human garbage disposal...

Tell me some of your kitchen fails! :)

Your email will never be displayed publicly, so don't be scared to comment! :) Oh and make sure you type in your blog link so I can click over to you! There is a spot you can type it in.

5 chews:

Novica- and a giveaway

Over the top pleased and happy. Wouldn't you be if you had this waiting for you when you got home from a crappy day at work??
Novica
Excited and happy. That is the best way to describe my experience with Novica. It's a site where artisans and craftsmen from around the world are given an outlet to sell their creations to the world. I purchased a cutting board from a woodworker name Teo. And I received a little book about him, and the piece.
Novica_Teo
He also enclosed a postcard from his county (Guatemala) with a handwritten note thanking me in his language for my purchase. Simply put, I'm hooked.
novica_board2
Fair trade, amazing quality, unique, a PERSON at the other end of the sale. This is no mass marketing of cheap products, this is real craftsmanship, with personality, and care. Now don't think this site is all wooden crafts, there are so many things you can find there: scarves, alpaca wool scarves, womens shawls from Indonesia, mens sweaters, silk jackets, womens brazilian accessories, and much much more.
novica_board
I bet you are wondering about the giveaway right? The people at Novica gave me two $50 promo codes, one for myself to get something (the awesome cutting board!), and one for you my awesome readers!

Since Novica ships products just about everywhere, everyone is welcome to enter the giveaway! To enter click on one of the links above (don't worry I don't get click through bonuses or anything, these are just some areas Novica wants to highlight) take a look around at what Novica has to offer, then come back here and tell me what you might buy! That's it!

One entry per person, must comment by January 25th Midnight EST.

Your email will never be displayed publicly, so don't be scared to comment! :) Oh and make sure you type in your blog link so I can click over to you! There is a spot you can type it in.

29 chews:

PB Oatmeal Chocolate Chippers

These need a warning label... a label stating that you might just eat all the dough and not bake any of these... a warning that once you do manage to get some in the oven, when they come out they will disappear in mere minutes. These things are dangerous!!!
pboatcookies

I was daydreaming about snack time at work yesterday... oh come now I know you do it too. And somehow I got peanut butter oatmeal cookies into my head... and then my brain added in some chocolate chips for good measure... I started jotting down a rough layout for the recipe and knew I'd be making them as soon as I walked into the door... ok fine I did manage to make dinner first.. (shrimp, broccoli, onions, mushrooms, udon noodles, in a tahini and soy spicy sauce... sorry inhaled it, no pictures) but THEN I made these.

pboatcc2
Any guesses on what I have for snack time today?? Yup, not these, because they are already gone... maybe I should make some more tonight...


PB Oatmeal Chocolate Chippers
recipe by ::steph chows::
makes 18 cookies (need to revisit this to get the number up to 24)

In a medium bowl whisk together and set aside
2/3 cup whole wheat flour
1.5 cups old fashion oats
1 tsp baking soda
dash of salt

In a large bowl beat together
1/3 cup smooth peanutbutter
2 tbs smart balance (or butter of choice)
1/3 cup brown sugar
1/3 cup splenda (or use 1/3 cup white sugar)
then beat in 1 egg and 1 tsp vanilla

Mix dry into wet, then add 3/4 cup chocolate chips

Using your hands (time to get dirty!) form into large balls and then smoosh flat onto a greased cookie sheet.

Bake at 350 in a preheated oven for 12-15 minutes. Remove and let cool.


Do baked goods disappear quickly around your house? Are you good and only let yourself eat a few at a time? Or do you eat them all in one big sitting?

Your email will never be displayed publicly, so don't be scared to comment! :) Oh and make sure you type in your blog link so I can click over to you! There is a spot you can type it in.

11 chews:

Weekend Fun

First things first, the winner of the winter cowl giveaway, picked by random.org is.... Tracy of Sugarcrafter! Conveniently enough she's another Rochester area blogger, looks like we'll have to get together for lunch so I can give her the cowl once I make it! What color would you like Tracy?? :)

How was everyone's weekends? Mine was fabulous! I got to hang out with Amanda from A Bow Meets Girl, we went and shot some targets and then headed out for lunch where I taught her how to make aforementioned winter cowl! She was a natural at it and picked it up super quick! Who knew there was another cool girl out there who likes to shoot bows AND crochet! So much fun :) Had I been smart I would have brought my camera to document said fun!
firstsnow
Guess you'll just have to deal with this snow picture instead. Rochester had its first snow of the season on Friday... crazy since it's half way through January! Sure was pretty though... gotta love catching fresh snow with the morning sunlight.... ummm I mean... cloudy snowy muted light?

What random hobbies do you have? Have you met up with other local area bloggers before? Or do you think it's weird? Has it snowed by you yet?


Your email will never be displayed publicly, so don't be scared to comment! :) Oh and make sure you type in your blog link so I can click over to you! There is a spot you can type it in.

5 chews:

Cinnamon Raisin Tea Cake

Don't forget to enter my giveaway here!

This was one of those recipes where I saw a picture over on Kari's blog... emailed her for the recipe... and made it that same night! And I was sooo sooo glad I did! Yes, there are two, one hour rises required... but you know what... I still started making it at 6pm on a weeknight, and it was WORTH it!
teacake
Ta-da!! This is a combo of a recipe her grandma made and another she found online (the main takeaway is she subbed the white sugar in the bread her grandma made for honey, creating a moist, NOT DRY, tea cake) Although I guess the point of tea cake is it's dry and you dunk it in tea... but who's counting! Of course I can't leave well enough alone so I subbed in 1/2 whole wheat flour, and 1/2 bread flour. I also used smartbalance instead of the butter, since again, that's what I had on hand. Oh and I only made 1/2 the recipe... which is what I'll write up below, it makes 1 cake instead of 2... I didn't need 2 tasty cakes sitting around, that's just asking for trouble!
teacake
Go make this... tonight... it's worth it... and eating it warm you don't even need the icing. YUM.

Tasty Cinnamon Tea Cake
recipe by Kari's Grandma, with a little tweaking by Kari, and then a little more by me

Ingredients:
Dough
1/2 cup milk
1/4 cup honey
1/4 cup smart balance
1-pkg active yeast dissolved in 1/4 cup warm water
1 cup whole wheat flour
about 1 cup bread flour (man need more when kneading)
1 large egg

Filling (sprinkle till it looks good)
Cinnamon
Succanat (she used white sugar)
Raisins

Icing
1/2 cup powdered sugar
2 tsp water

Instructions:
Combine the yeast and warm water until it looks creamy and let sit for 10 minutes.

While you're waiting for the yeast, combine the milk, butter(smart balance), egg, and honey in a separate bowl. Add to yeast mixture and slowly stir in 1 cup whole wheat flour, slowly add the 1 cup bread flour, 1/2 cup at a time.

Place dough on a lightly floured surface and kneed for around 8 minutes adding flour as necessary.

Place dough in a floured bowl and cover with a damp towel, placing in a warm dry place to rise for about an hour. I like to microwave a rice filled heating pad for one minute and then place the bowl on top of it in the microwave, it keeps it nice and warm :) (don't microwave the dough... just the pad...)

Take the dough and punch it down. On a floured surface, roll out. Cover in sugar, cinnamon, and raisins. Kari's grandma used to tell her to, "give it a dirty face," when she wasn't putting on enough cinnamon.

Then roll the dough and form into a circle. Place the dough in a greased cake pan. Using a sharp knife or kitchen shears, make cuts every inch or so along the circle, cutting only 3/4 of the way through. Twist each section slightly so that the rolls fan out.

Cover with a damp cloth and place in a warm dry place to rise for another hour.

Preheat your oven to 375. Bake for 25 to 30 minutes, or until golden. Remove to a cooling rack.

After your tea ring is cooled, you can ice them. Simply mix all of the icing ingredients and drizzle it on your ring.

Your email will never be displayed publicly, so don't be scared to comment! :) Oh and make sure you type in your blog link so I can click over to you! There is a spot you can type it in.

11 chews:

Local Food Banks

Psst. Don't forget to enter my awesome giveaway here!
--------

I'm all about donating food, whether it's to a specific family you adopt for the holidays or to a more general food bank... I can't imagine going hungry or wondering if I'd be able to put food on the table for my family each night.

I'm always willing to help spread the word for a good cause and when I was told by MyBlogSpark about a promotion ShopRite is currently doing I knew I had to pass on the info. For each like they get on Facebook they will donate a can of food to a local food bank. I know I know.. liking on Facebook is annoying, you like to leave it for your friends only... but maybe this once you can do it... at least for a bit (then unlike them when they aren't looking... what... umm I never do that...)


Your email will never be displayed publicly, so don't be scared to comment! :) Oh and make sure you type in your blog link so I can click over to you! There is a spot you can type it in.

0 chews:

Cowl - Tutorial and Giveaway!

**GIVEAWAY NOW CLOSED**

Happy Monday everyone! With the holidays over and everyone settling back into their routines I thought it would be fun to do a little more gift giving. This time of year is perfect for staying in, cozying up with a fire, a good movie, and a fun crochet project. Last week I saw this pattern over at The Wrong Century, and immediately started it that night. A few TV shows and a movie later and I was done! I ended up changing the pattern somewhat from the one Jeanne found, but I'm really happy with the results.
cowl
Now the fun part, a giveaway!! You pick the color and I'll make it up especially for you! (choices are off white, cream & dark brown) I just want to thank you all for coming back to listen to me ramble on, and commenting, which always makes my day (well except for those few mean comments... seriously do people have nothing better to do with their time??) And for those who don't win... the pattern! So you can make one yourself!

How to enter: (I'm willing to ship to US and Canada, sorry everyone else, it's just too darn $$!) You can enter any or all of the following ways. (leave a separate comment for each entry if you are doing multiple entries) You have until Sunday the 15th by noon EST to enter

1) Leave a comment telling me what you like about my blog and/or what you'd like to see more of.
2) Follow my RSS feed. (you can use the subscribe button in the left column). Then leave me a comment telling me you did, or telling me you already do.
3) Like ::steph chows:: on Facebook. Leave a separate comment saying you did, or already do follow.
4) Follow @steph_chows on Twitter. Leave a separate comment saying you did, or already do follow.
5) FB or tweet about the giveaway, make sure to link back to this post. Leave a separate comment saying you did.

Now the pattern. I used a worsted weight yarn and a size K hook. It looks more complicated than it really is! You can print a PDF of it here.

Ch 150 and join in the first ch with a sl st.
Row 1: ch3 (counts as a first dc), place marker if you wish, *(skip 1 ch stitch, dc in next ch, ch1)* repeat from *, join with a sl st in the top of ch3
Row 2 : ch2 (counts as a first sc), *(sc in the space between two dc in previous row, ch1)* repeat from *, join with a sl st in the top of ch2
Row 3: ch2 (counts as a first sc), *(sc in the space between two sc in previous row, ch1)* repeat from *, join with a sl st in the top of ch2
Row 4: repeat row 3
Row 5: ch3 (counts as a first hdc), *(skip 1 ch stitch, hdc in next ch, ch1)* repeat from *, join with a sl st in the top of ch3
Row 6 : ch2 (counts as a first sc), *(sc in the space between two hdc in previous row, ch1)* repeat from *, join with a sl st in the top of ch2
Row 7: ch2 (counts as a first sc), *(sc in the space between two sc in previous row, ch1)* repeat from *, join with a sl st in the top of ch2
Row 8-9: ch2 (counts as a first sc), *(sc in the space between two sc in previous row, ch1)* repeat from *, join with a sl st in the top of ch2
Row 10: ch3 (counts as a first dc), *(dc in the space between two sc in previous row, ch1)* repeat from *, join with a sl st in the top of ch3
Row 11-14: repeat rows 6-9
Row 15: ch3 (counts as a first hdc), *(skip 1 ch stitch, hdc in next ch, ch1)* repeat from *, join with a sl st in the top of ch3
Row 16 : ch2 (counts as a first sc), *(sc in the space between two hdc in previous row, ch1)* repeat from *, join with a sl st in the top of ch2
Row 17-18: ch2 (counts as a first sc), *(sc in the space between two sc in previous row, ch1)* repeat from *, join with a sl st in the top of ch2
Row 19: ch3 (counts as a first dc), *(dc in the space between two sc in previous row, ch1)* repeat from *, join with a sl st in the top of ch3
Row 20: repeat row 2
Fasten off and weave in ends.

Now one more step, In order for both sides of the circle to look finished I did one row of (sc, ch, sc) around the starting edge (where you started with ch 150). You don't have to, but it looks a touch more finished. Attach your yarn and ch2 (counts as a first sc), *(sc in the space between two dc in previous row, ch1)* repeat from *, join with a sl st in the top of ch2
Fasten off and weave in ends.

This pattern is for personal use only and may not be reproduced for commercial purposes.

Your email will never be displayed publicly, so don't be scared to comment! :) Oh and make sure you type in your blog link so I can click over to you! There is a spot you can type it in.

45 chews:

Gingerbread Bagels

I fully admit, I'm a Panera Gingerbread Bagel addict... you've heard my stories before. Making my parents who live in another state buy out stores and freeze them for me, attempts at making them at home... all failures... but let me tell you my lovely readers, I'm close... soo close to perfecting the recipe. In all reality even if I didn't get any closer I'd be happy with what came out of the oven last week.

Delicious, home made, screw you panera for not having my beloved gingerbread bagels this year, gingerbread bagels! :)
gingerbreadbagel2
Did I just really write screw you panera... I know, I know, don't be negative, but I was seriously heartbroken when I heard they would not have them this year. I proceeded to call every panera in my area (and then called a few in states I have relatives living in...yes I was that desperate) to ask if they would be having gingerbread bagels this year at their location... I just assumed the first three bakery employees I talked too had no idea what they were talking about! They had NEVER HEARD of the panera gingerbread bagel and informed me they didn't exist!! LIES!!! I knew they existed once, and was growing more and more depressed with every location I called to only be told again and again, that they would not be selling them this year. :( The reason given was to keep the variety of the menu always changing. I'm calling BS on that and am still boycotting them. Sorry panera, you lost me as a customer when you made me wait all year for my true love, and then told me he's not showing up. Horrors.

But I don't need you panera, because I figured out how to make them at home. And make them at home I will! Obviously I'm not going to keep my recipe to myself, I'm going to blast it as far and wide as I can so that all the other gingerbread bagel loving crazies out there can have a little slice of deliciousness back in their lives on their time table... not YOUR time table panera. :D Sure limiting something delicious to one time of the year makes it special... but limiting it to once a year and then discontinuing it is just plain MEAN if you ask me.
gingerbreadbagel
So roll up your sleeves peeps and get kneading, I hope you love these as much as I do! They take a little bit of time, and a few special ingredients, but in the end they aren't rocket science or anything.

::steph chows:: gingerbread bagels
recipe by steph chows

1 cup warm water (105-115 degrees)
2 teaspoon yeast
2 tablespoon molasses
3/4 teaspoon salt
2 teaspoon canola oil
1 cup barley flour (I found this is the natures market section of my grocery store)
2 cups unbleached all purpose flour (might need a little more or less, depending on stickiness of your dough)
2 tsp cinnamon
1 tsp ground ginger
1/4 cup finely chopped candied ginger
1 Tbs barley malt syrup

Start by place water, yeast, and molasses in a large bowl (if your bowl is cold it will bring the temp of the water down quick, so I usually run some warm water in the bowl first to warm it up a bit, then dump it out and add in all your ingredients). Stir with a wooden spoon to dissolve yeast and molasses, let sit for 5-10 minutes or until mixtures begins to foam. (If this does not happen your yeast was either dead or your water was too cold or hot. AKA you have to start over, if you keep going they wont rise)

Once yeast is ready, add oil, salt, cinnamon, ground ginger, and whole wheat flour. Begin to knead with your hands, start adding the white flour as needed until the dough pulls away from the side of the bowl (dough should still be kind of soft, just not sticky. You may need more or less than the 2 cups I indicated.) Remove from bowl and continue to knead on a floured counter for 10 minutes. (add in the 1/4 cup candied ginger towards the end)

Roll dough out onto a mat or cutting board and cut into 8 equal sized pieces. Cover with a towel and let rest 30 minutes.

Form dough balls into bagel shapes (I use the poke your thumb through the middle method). Cover and let them rest for another 30 minutes.

Pre-heat your oven (and in my case a baking stone) to 425˚ and bring a large pot of water to a boil with 1 Tbs barley malt syrup. (this may be the hardest ingredient to find, and totally necessary! I found mine in the international aisle of the grocery store)

Toss your bagels into the pot of boiling water and boil for 1 minute, flip them over and boil 1 additional minute. Once all the bagels are boiled I put them on a cornmeal covered pizza peel and transfer them to my baking stone. Bake for 20 minutes, or until the bagels are golden and cooked all the way through (time may vary depending on your oven).

Let them cool enough so you don't burn your hands off, cut and serve with your favorite cream cheese. Mine is paneras hazelnut cream cheese... guess who needs to figure out how to make that at home now :)


Am I over reacting with my love of gingerbread bagels? And sadness/sarcasm over Panera discontinuing them? Have you done anything nutty like this when a company discontinues your true love? It's ok, you can call me crazy ;)


Your email will never be displayed publicly, so don't be scared to comment! :) Oh and make sure you type in your blog link so I can click over to you! There is a spot you can type it in.

13 chews:

24x24 intro to sushi making

Happy New Year!!! What did you all do?? John and I got to celebrate 24x24 Foodbuzz style and went to the NY wine and culinary center to take an intro to sushi class! We are serious sushi lovers so the thought of being able to make the stuff at home got us very excited. I was a little worried our rolls were going to look more like a science experiment then they would edible art... but I must say I was surprised how well we did!

platter

The first thing we learned was how to properly cook the rice. You have to make sure to rinse it until the water runs clear (rinse about 3 times). Put the rice in a pan and distribute evenly. Now we add the water (unmeasured!) basically stick your finger in so it lightly touches the top of the rice, and fill the pot with water until the water is up to your first knuckle. Turn your heat on high and once it starts boiling turn it to medium and simmer until you can't see any more water above the rice line. Now turn off the heat and cover with tinfoil, let sit for 10 minutes. While it's sitting mix together 1/3 cup rice wine vinegar, 1 Tbs kosher salt, and 3 Tbs sugar. Now the fun part, drizzle the vinegar mixture in and fluff around using chopsticks (don't mash the rice), then spread it out onto a cookie sheet and start fanning it like made to cool it down!

fan

FAN FASTER!!!! Yes I was actually jokingly yelling this at John as he fanned... the other students gave us some funny looks... HA!

I asked the teacher if he was sure this was a real step and not just trying to fool us all into looking ridiculous :)

OK now that you have your rice it's time to make some rolls! We each were given a sushi mat and fully covered them in saran wrap. Take a sheet of nori (it's seaweed) and place it shinny side up. Keep a bowl of water to dip your fingers in to the side. Dip your fingers and take a handful of rice and place in the center of the nori, gently spread out to cover the full sheet side to side, leaving 1/2 inch at the top and 1/4 inch at the bottom (if you are doing an inside out roll, rice on the outside, leave 1/4 inch at both the top and bottom). Try not to handle the rice too much and smash it, you want them to stay individual pieces of rice, not a bunch of moosh.

guts

Next add in your guts (2/3 of the way down, make sure you have all ingredients equally distributed)! We made all different kinds of rolls. Veggie rolls with avocado and cucumber, ones with crab sticks and spicy mayo, I made one with salmon, avocado and honey YUM! John even tempura fried some shrimp and made a super delicious roll with them! Yes you read that right, the man who doesn't eat fried things actually tempura fried his own shrimp!! Go husband!

insideout

Now to get rolling, bring the side closest to you up and curl it around your guts, apply equal pressure across the length of the roll with your left hand as you pull the bamboo sheet away from you with your right hand.

roll

Continue pulling away and pressing down until the roll is fully out of the bamboo sheet and on the table.

stephrollin

Now to slice, the most important thing is that you have a super sharp knife... otherwise... whomp whomp. Total smooshed not so pretty badness. Also make sure you slice your roll evenly so the pieces are all the same size.

How super easy was that?? I think the hardest part was cutting them without smooshing the insides out. What combos would you do? One of my favorites at a local sushi place is a tempura shrimp, crab stick, spicy mayo, spinach, tomato, and BACON!! Yeah it's a biggie, but it's delicious!!

Full disclosure, Foodbuzz paid to make our event possible. Thanks Foodbuzz!


Your email will never be displayed publicly, so don't be scared to comment! :) Oh and make sure you type in your blog link so I can click over to you! There is a spot you can type it in.

10 chews:

Want more chow like what you just read? You can click to subscribe to the feed, follow me on twitter, or become a fan on facebook! Can't wait to see you there!
Copyright © 2012 :: steph chows ::.