Share |
Showing posts with label DIY. Show all posts
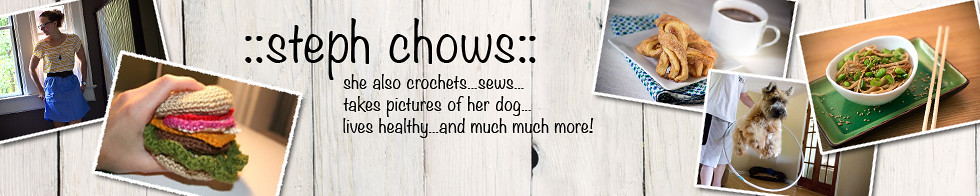
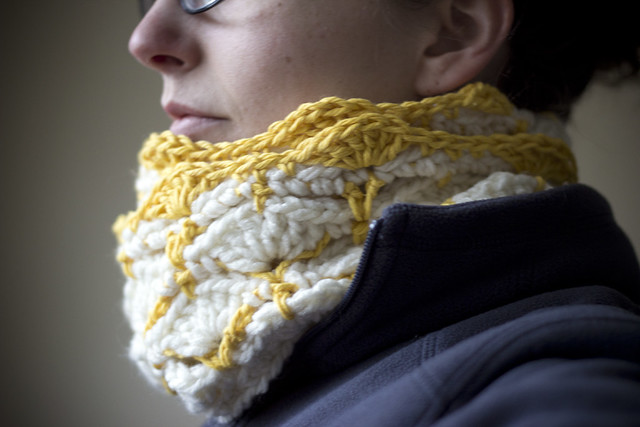
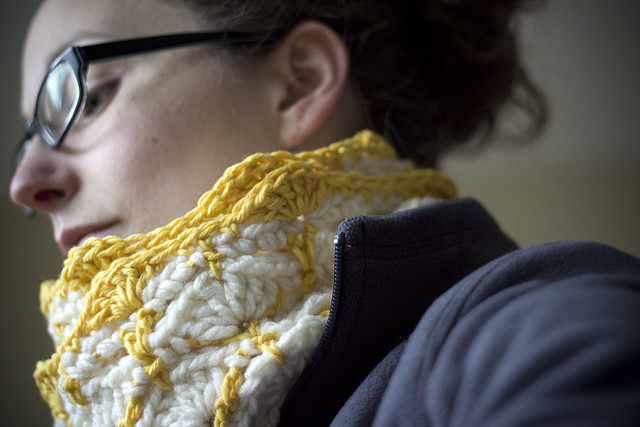
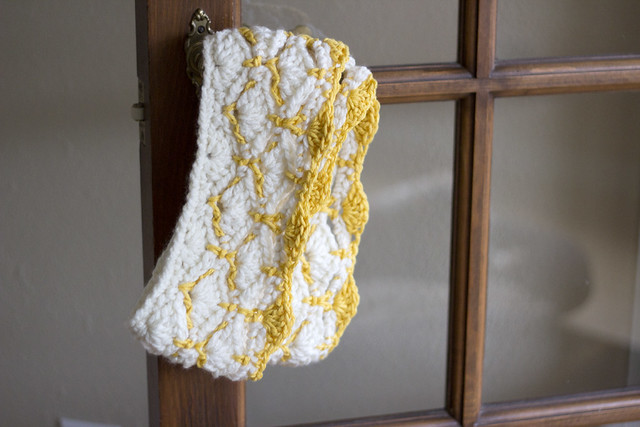
OK this hat might look familiar to a good number of people... it was my go to christmas gift because I'm so in love with it. The pattern is super easy to follow and once you get past R4 it is just a repeat and easy goings! I may have a few in different colors that I made just for myself...


If I didn't already give you one... go and find the free crochet hat pattern here and start hooking! What's your favorite free crochet hat pattern?? I'm always looking for new things to make!


Your email will never be displayed publicly, so don't be scared to comment! :) Oh and make sure you type in your blog link so I can click over to you! There is a spot you can type it in.

Love the burst of sunshine this hat brings to these overly cold autumn days. Seriously, it just snowed last night! It's looking way more like Christmas outside than it is Thanksgiving. That probably also has to do with the fact everyone already has their lights up and ON!!!??? Seriously people, can't we just celebrate one holiday at a time?

I get it I get it, last weekend was warm, so you wanted to put your lights up while it was warm. That's fine... could you just restrain from turning them on until after Thanksgiving maybe?? It's bad enough Wegmans had all of their decorations up (I kid you not) the DAY AFTER HALLOWEEN!?!?! Really!!! Come onnnnn now!

Sorry rant over. Back to this awesome amazing winter hat. You can find the pattern for free over at Gleeful Things. She has a bunch of fun free patterns, so go check her out!! I love when people post free patterns, it's the best!!

How are all of my US readers celebrating Thanksgiving this week?? For my non US readers, what are you all up to this week? Anything fun?


Your email will never be displayed publicly, so don't be scared to comment! :) Oh and make sure you type in your blog link so I can click over to you! There is a spot you can type it in.

This cowl pattern came out of me starting a blanket using a pinwheel square, and getting sick of making them really fast :) boredom is the mother of invention. I love the way that it peaks out from my coat.
 On its own you can see it a bit better though.

Super simple to make and perfect for using up a bit of old yarn you have laying around. Simply follow the pattern below to make one hexagon. Repeat until you have 8. Piece together as shown in the below image. Add a button and you're done. BAM walk out the door looking awesome.


Hexagon: (make 8) I used worsted weight yarn and coordinating hook.
R1 Start with a magic circle and sc 12 into center.
R2 Ch 6 (counts as 1 tr and ch-2), (tr in ring, ch 2) 11 times, join with sl st in 4th ch of beg ch-6 – 12 ch-2 sp.
Rnd 2: Sl st in next ch-2 sp, ch 3 (counts as dc), 2 dc in same ch-2 sp, [3 dc in next ch-2 sp, (3 dc, ch 2) in next ch-2 sp] around, join with sl st in top of beg ch.


Your email will never be displayed publicly, so don't be scared to comment! :) Oh and make sure you type in your blog link so I can click over to you! There is a spot you can type it in.

I'm on a little girl's dress making spree. They are just so fun to make, and since they are small, they go together super fast! What's not to love?
You know what makes something go even faster? Bias tape. How haven't I used this stuff before?? I bought some to edge my burlap bag pattern, and I used the rest of it up on this dress. And I may have already gone out and bought a whole bunch more in different widths and colors... because I want to make more things!!!

I started off with this dress pattern, and I had all plans on following the whole thing, but then I decided to finish the armholes with bias tape... and figured... why stop there!? Lets do the neck with bias tape too!!

Adorable! As you can see Hobbes wanted to get in on the photo action. Even though she had a whole yard to run around... she wouldn't budge from under where I hung the dress.


Your email will never be displayed publicly, so don't be scared to comment! :) Oh and make sure you type in your blog link so I can click over to you! There is a spot you can type it in.


Sometimes patterns are so simple and sew up it's hard to believe I don't get around to doing them quicker. I pinned this one year ago... why oh why did it take me so long to actually SEW this!? Hmm maybe because that post only gave an idea of the pattern, not one you could just print. Don't worry though I made sure to save my pattern to share with you. Which means you can print it out and be done with this cute dress in less than an hour!


Look at that girl! She is cuter than cute! And the dress is reversible! So she asked to wear it two days in a row. You know this aunt right here felt so very special that her little neice loved it so much.

My heart melts looking at how cute she is. Here's the pattern I drew out and used. It JUST fit her though (18months), the neck could have been a bit larger so if I were you I'd extend the straps by an inch (added into pattern PDF).

Download the pattern for free here.

Cut out two complimentary fabrics on the fold. Add a quick pocket if you like. Then place right sides facing together and sew along each armpit and then around the entire outer edge. Leave the top of a 4 straps open. Use one of these openings to pull entire dress through so it will be right side out. Iron flat and top stitch around all edges (just don't close off the strap openings yet). Final step, cross the straps in the back and fold over one edge so the front strap fits into the back strap piece, sew one line across each and you're done!

The back is open so make sure she's got a cute diaper cover on, her bum is suppose to stick out a bit. Another plus, this dress makes for super easy access when potty training, making this dress cute AND functional. Double bonus!

Make sure you save this post for later and Pin It so it doesn't get lost!


Your email will never be displayed publicly, so don't be scared to comment! :) Oh and make sure you type in your blog link so I can click over to you! There is a spot you can type it in.


If you've been around the blog awhile, you might have seen my post last year about my strapless burlap dress creation for the Joe Bean eco challenge. I didn't win last year but knew I wanted to try again this year! Instead of a rather uncomfortable to wear dress I decided to go with something that was actually usable.

I am SO excited for this purse. I will totally be rocking it after the competition is over. If you want to see it in person along with the other 40 artist's creations, head to Joe Bean Coffee Roasters on Sept 6th to see them all!! I'll be there to sign autographs... since I'm famous *coughcough*

Fingers crossed... although I'm sure there will be some stiff competition.

Want to make your own? Here's how. (totally realize I should have taken pictures... but really it's easy!)


  1. Cut a rectangular piece of burlap and a rectangle of an old t-shirt (for the lining) to the same size. 
  2. Fold materials in half to form a square (nice sides facing in).  Cut a nice curve into the top of both (this is where your handle goes). Sew up along both sides.
  3. Flip bag corners out and sew a line  through each corner to create a box bottom (video tutorial here, you don't need the tool they are selling, just use a ruler. It sounds more confusing than it really is)
  4. Flip burlap right side out and place lining inside. Use double fold bias tape to hold lining and burlap together and sew along curve.
  5. Do the same around the entire top opening of the bag. I added a piece of burlap bag edging into the center of the bias tape to give the top extra strength for when you hold the bag.

click to enlarge


Your email will never be displayed publicly, so don't be scared to comment! :) Oh and make sure you type in your blog link so I can click over to you! There is a spot you can type it in.

Cancer Sucks. Chemo caps don't have to. Searching around for a cute chemo cap doesn't bring up too many results for crochet versions. I half wonder if people don't want to tout their creations as being chemo caps. It's such a negative word, chemo. But when a family member was diagnosed with lymphoma and told she would indeed be loosing her hair, the first thing I asked her was what color hat she wanted me to make her.


"How about white... and maybe a navy one too if you could?"
Happily can do.


I stumbled upon a new stitch recently in this book: 101 Crochet Stitch Patterns & Edgings. It's rather simple. 1 SC and then 3 DC all into the same spot, skip 3 stitches and do it again. The book worked the stitch back and forth, but I decided to try crocheting in the round and the wonderful twirling texture you can see above was the gorgeous result.


Sure you can make one of these for winter, but I think they work as a chemo cap too, made with lots of love and thoughts going into every stitch.

Crochet Chemo Cap
I used Red Heart Soft Yarn, worsted weight (4) and an H hook. This is worked in a round, no turning.

R1: Start by making a magic circle loop, make 6 SC into the loop, and then pull closed  – 6 sc.
R2: 2 SC into each SC around – 12 sc.
R3: [2 sc in next sc, sc in next sc] 6 times – 18 sc.
R4: [2 sc in next sc, sc in next 2 sc] 6 times – 24 sc.
R5: [2 sc in next sc, sc in next 3 sc] 6 times – 30 sc.
R6: [2 sc in next sc, sc in next 4 sc] 6 times – 36 sc.
R7: [2 sc in next sc, sc in next 5 sc] 6 times – 42 sc.
R8: [2 sc in next sc, sc in next 6 sc] 6 times – 48 sc.
R9: [2 sc in next sc, sc in next 7 sc] 6 times – 54 sc.
R10: [2 sc in next sc, sc in next 8 sc] 6 times – 60 sc.
R11: [2 sc in next sc, sc in next 9 sc] 6 times – 66 sc.
R12: [2 sc in next sc, sc in next 10 sc] 6 times – 72 sc.

For the remained of the hat [SC plus 3DC into next SC, sk 3] repeat until hat is desired length and end with a slip stitch. (Each shell is going into the first SC of the previous row shell.) I did 12 rounds of this shell pattern for a total of 24 rounds from start to finish.


Your email will never be displayed publicly, so don't be scared to comment! :) Oh and make sure you type in your blog link so I can click over to you! There is a spot you can type it in.

I just finished writing up this post... I was putting the finishing touches on it. I typed something I did like so I hit Control Z (edit undo) and for some reason it undid the whole post... as I was staring at the blank screen totally dumbfounded, it auto saved, talk about adding insult to injury. There was no undoing, nothing to bring back that long detailed post. I may have started cursing my head off...maybe...

*sigh* I do still love this shirt, even if I have to rewrite this whole darn thing. You see, it's a halter top, but with a wicked fun drapped low cut back. A single braided band attaches at the base of the old armpits holding everything together (and making it so you don't have an accidental side boob slip). It's my new go to workout shirt! Well minus the sports bra for the photoshoot. It's harder to see how the back attaches when you have a sportsbra in the way.


So yeah, this + a sport bra = my new go to workout top for hot spring/summer days! It's rather easy to make and comes together with only a few stitches in a couple spots. If you make your own and blog about it please leave me a link in the comments! I'd love to see, and if you could link back here to the instructions I'll love you forever :)

Now onto the steps... just follow along with the photos and you'll be sporting this sassy shirt in no time.

First start by folding your shirt in half down the middle.

Once the sleeves and neck are gone open and fold so that the armpit holes line up and the shirt is on its side (2nd image down). Then with a gentle down slope, cut off the back from bottom of armpit down. (3rd image down)

Open up the now freed back and cut away excess as shown in 2nd image down, then cut each of the straps into 3 pieces.

Braid each strap and knot the ends. Cut one strap off at shoulder and reserve the braid (we will attach it to the back in a moment). Create the halter top by sewing or tying the remaining attached braid to the other shoulder (2nd image down).

Finally take your reserved braid and attach each side at the bottom of the old armpits (if your shirt has side seams this is a great indication of where you should be attaching things. Try on and walk around town like a badass. I mean you might as well show off the muscles you've been working hard on right?


Another friend had a baby! You know what the means, crochet time!! Since I just mailed this yesterday I hope I'm not ruining the surprise, but lets face the facts, she's got way more important things to do with any spare time she has right now. #1 on that list being sleep, NOT reading my blog. So I think we're safe people.

Devin if you are indeed spending your few spare not busy moments reading... stop now or you'll ruin the surprise! :)


The first thing I made her was a set of super cute slip on booties (free ravelry download-you need a free account to access). I used a ball of baby soft white yarn along with a very thin pink yarn. It made the booties a nice light pink and not OVER THE TOP pink. I love how easy they crochet up, you basically make a T and then sew them together for a cute wrap over detail.


Then it was onto a cute toy. I love this stuffed turtle pattern (free pattern from lion brand) and knew I wanted to make it again. Sure you could go with shades of pink instead of green but I guess I'm a traditionalist... at least at this exact moment, don't ask tomorrow... I'll probably be having a crazy idea of making it with cow spots or something.


Your email will never be displayed publicly, so don't be scared to comment! :) Oh and make sure you type in your blog link so I can click over to you! There is a spot you can type it in.

Winter can be so grey, white, boring. Why not inject a bit of bright sunshine into the mix?
springcolorcowl3
I'm part of a knitting/crochet group that is constantly creating cowls, hats, gloves, socks, baby blankets... the list goes on... for all types of charities. Some go to newly relocated refugees. Some go to homeless shelters. Some go across the globe for charities like wool aid. I'm not sure where this cowl is going but I hope whoever receives it loves it as much as I do. I know it will keep them warm and snugly.
springcolorcowlSide
The pattern is worked in a large circle and comes together quickly with some nice thick yarn. The yellow contrasting yarn is a bit thinner but I love how it still POPS off the white! As for yardage I unfortunately don't know :( I was using different skeins of yarn donated to our group and none of them had labels on them. If I had to guess I think the white was a Bernart Roving - Rice Paper, and I used the entire skein. The yellow was probably a light (3) weight yarn, and I did not use a full skein. I'll be making this again and when I do I'll make sure to get a better estimate on yardage for you!
The pattern can be found here.

springcolorcowl2
springcolorCowl

Don't know how to make a shell pattern, it's really easy, just keep scrolling :) Click here to see it larger.

How to crochet a shell border

PS. I've picked winners for the giveaways and emailed you, so check your email to see if it was you who won!


Your email will never be displayed publicly, so don't be scared to comment! :) Oh and make sure you type in your blog link so I can click over to you! There is a spot you can type it in.

I have been on a serious cowl making kick. Don't worry, you'll get to see them all in due time. The one I was planning on sharing with you today needs a few more tweaks to the pattern before I can reveal it though. So keep your pants on and check out this cowl/scarf for now!
greenscarf
The color wont be a favorite of everyone but the snuggle factor will be. This is the most seriously soft yarn I've ever used. I had made a baby blanket out of it and had just the perfect amount left to make this scarflette. Using a double crochet pattern for the whole thing leaves the perfect button hole opening... wherever you feel like. Start by chaining 63, DC into the third chain from the hook, then DC across until you reach the end of the row. Ch3 (counts as first DC) and then keep doing the same thing for 6 rows (or as wide as you'd like it to be) and this thing is done in an hour flat. Sew on a cute button, fasten it through one of the double crochet spaces and you're out the door, snuggled and warm.

I used sensations goldenrod yarn which I got on serious clearance... which I'm now realizing might have been because it's no longer made?? I can't find it anywhere in stock?
greenscarf2


Your email will never be displayed publicly, so don't be scared to comment! :) Oh and make sure you type in your blog link so I can click over to you! There is a spot you can type it in.

That girl would look good in anything, even a burlap sack... ok that may not be the case for me, but it was still fun participating in an upcycling event hosted by Joe Bean Coffee Roasters, Thread, and Greentopia!
burlapbag
The rules were simple, pick up a burlap coffee sack from Joe Bean and make it into something fabulous. I chose a strapless dress, because I'm oh so classy. My favorite part is the herringbone exposed zipper in the back, too cute right?
burlapdressback
Note to self: when sewing burlap remember to add ample seam allowance, it will unravel and burlap does NOT stretch... (not pictured, me from behind with the zipper not being able to zip the last 3 inches up... awesome)
burlapdress
Want to see my creation along with others on display?? Come to Joe Bean tomorrow for First Fridays and vote for me to win!! Ok you don't have to vote for me, but come on down and see all the awesome creations and drink some of the most delicious coffee around!

See you there??

Your email will never be displayed publicly, so don't be scared to comment! :) Oh and make sure you type in your blog link so I can click over to you! There is a spot you can type it in.

Want more chow like what you just read? You can click to subscribe to the feed, follow me on twitter, or become a fan on facebook! Can't wait to see you there!
Copyright © 2012 :: steph chows ::.